Showing posts with label Tips (All). Show all posts

Sunday, June 10, 2012

Doubling Frosting

I read here that you can whip up your store-bought frosting and it will double in just a short time.

I was skeptical but just had to try it.

I started with a Creamy Supreme Classic White frosting from Pillsbury.


Here it is in the bowl before I whipped it:

And after:
Not sure it quite DOUBLED, but it did increase in volume.  I did notice at the grocery store that the same size can of frosting for the whipped version weighed less than the non-whipped version, though not half as much.  So that tells me that this is a legit tip, in theory.  My only thought is that it isn't doubled, but it is increased (in my experiment anyway).  Obviously if you're adding air to it, it's going to fill it out.  Good tip!


Thursday, June 7, 2012

Pinterest Lesson for Mom - Part 1

Lesson 1 - Getting Your Head Around What Pinterest Is

This is for my mom, who has a Pinterest account but ZERO boards and ZERO posts.

I want you to know how fun it is to pin away, so I'm going to give you a little crash course for beginners. Nothing fancy yet.  Nothing scary.  I just want to explain it to you in my own way.

The first lesson is very simple -- Get your head around how Pinterest works and what it is.  Mom (and several other non-pinners I've spoken with) have said they "don't get Pinterest" and just don't understand what it is.

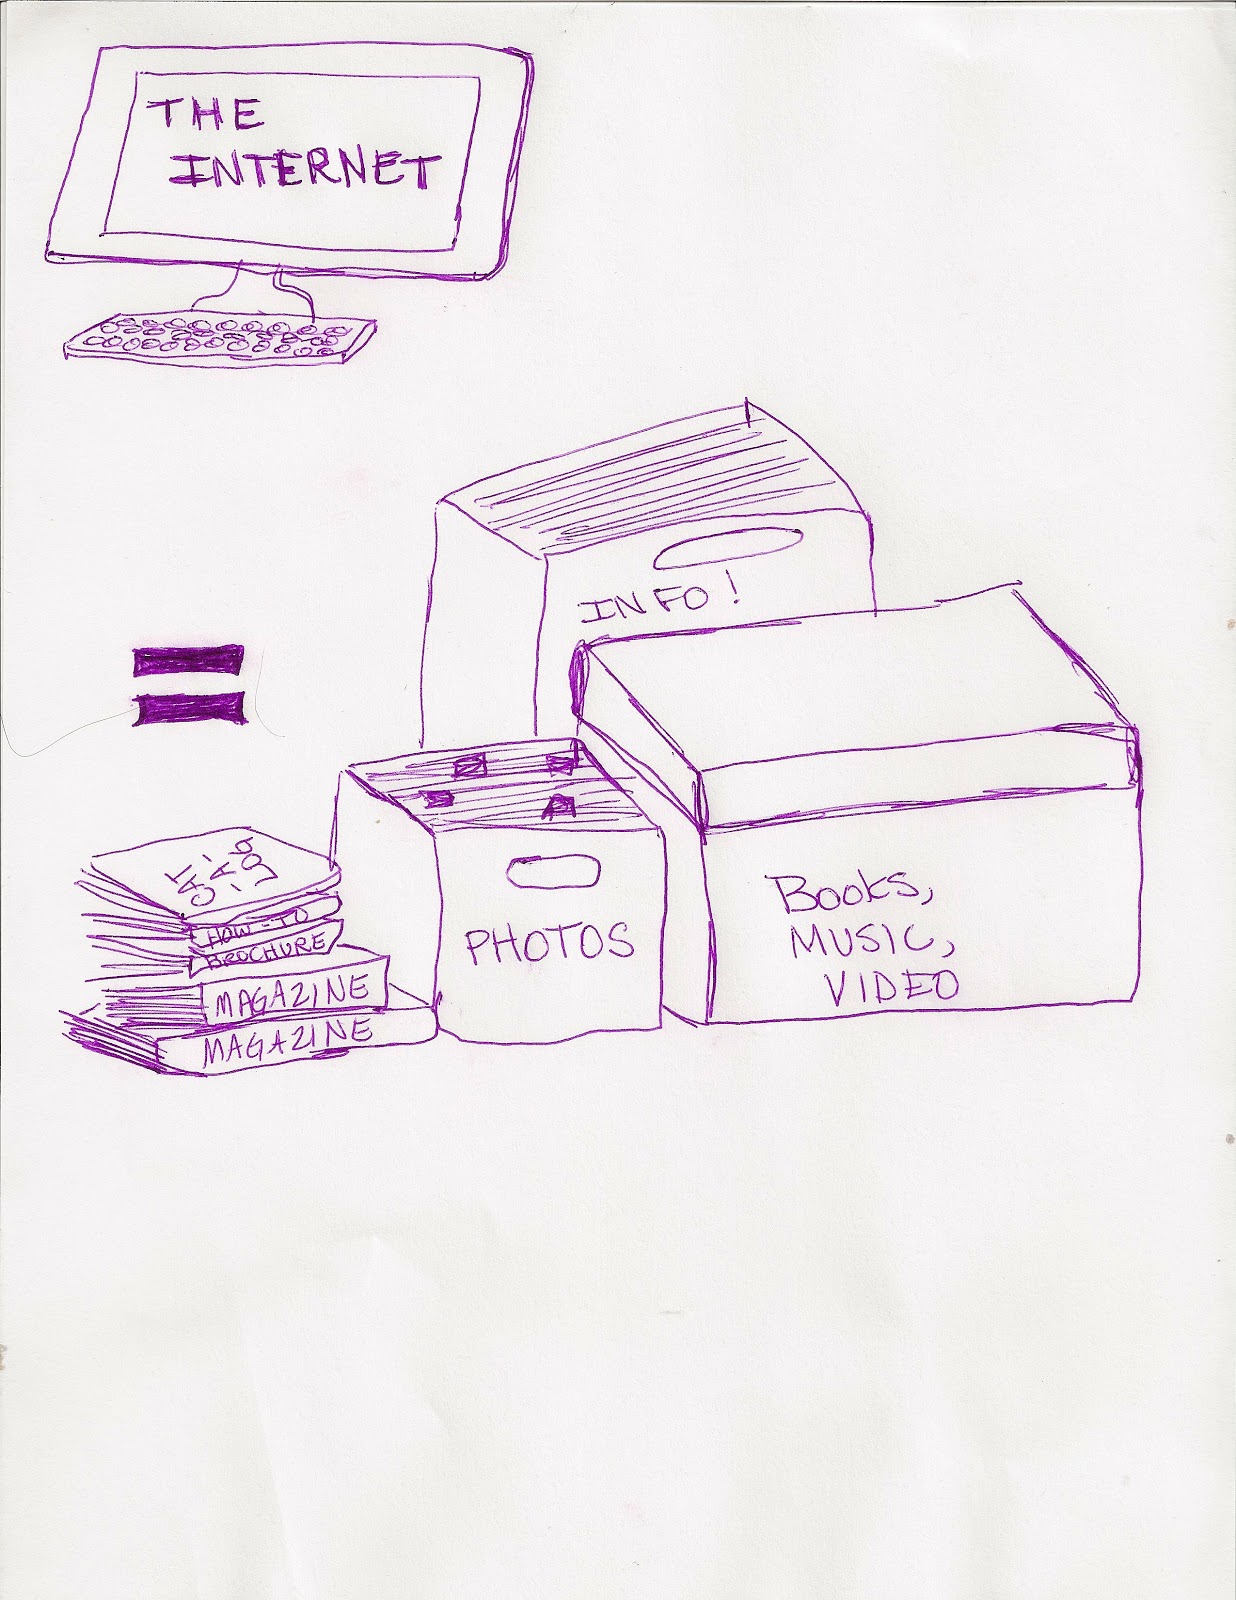
Imagine the entire internet is a huge stack of magazines, books, photographs, catalogs, brochures, etc.


Now imagine that Pinterest is a big blank wall in your house.  You have a bunch of bulletin boards on the wall for different categories.  (These are, you guessed it, your BOARDS.)  You can name these boards things like "Crafts," "Recipes," "Gifts to Buy My Daughter," etc.

If you see something you like on the internet, you just tear out the page (or picture or some words) so you can go back to it later.  (That's a PIN.)  You're going to take that picture you tore off the "paper internet" and assign it to any board you want.  (That's PINNING.)


The cool thing is this.  Let's say you wanted to keep a really long article you saw online about the joys of having an amazing daughter.  Seriously, you should do that.  Anyway, suppose the article is really long, and it wouldn't be convenient to tear out the whole article and all its accompanying photos.  So you just take one photo from the article to remind you what the article is about.  You pin that, and Pinterest will automatically link it with the article.  You can add your own description if you want to.  Then later you can go to your boards, click on that picture, and it will take you to the site where you first found it.

Easy, right?

Next lesson coming soon!


Monday, May 21, 2012

No-Streak Dark Tint for Jars

Streak-free / dark tint

This was my very first attempt at tinting jars, and it was easy and fun!

Here's what I wanted to achieve:
- No streaks
- Easy
- Inexpensive
- Dark tint

From what I'd been reading, to get a really dark tint you might have to go with a glass paint, but it can be expensive and complicated.  Not for my first try, thank you.  I also read that if you use a food coloring method, the darker you go, the streakier it gets.  Not pretty.  So I tweaked what I found and came up with this.

Step 1: Protect your work surface.  I found these disposable changing pads in my son's room while I was cleaning it out over the weekend.  Since he's five now, I think I'm safe using them for crafting now.

Step 2:  Gather supplies.
- A dry, clean, clear jar (this is a spaghetti jar with label removed.)
ModPodge Gloss
- Food coloring (I used the least expensive food coloring I could find since it was for crafting and not consuming.)  You could probably use gel or liquid coloring.  I used liquid.
- Plastic cup or bowl
- Spoon
- Ignore the paint brush in this photo.  Didn't need it; didn't use it.


Step 3:  Mix it up.  I DID NOT add any water to the mixture.  This was one way my version differed from others I'd seen.  I just poured about 1/4 - 1/2 cup of Mod Podge into a plastic cup and added a lot of food coloring.  For this project I used green with a little blue.  Stir and and add coloring until you get the desired depth and hue.

Here's the color I got.  Remember it will get quite a bit darker after it's heated.

Step 4: Pour the mixture into the glass.  Don't use a paintbrush.  That could cause streaks.  I just dumped it into the jar, but next time I'd kind of drizzle it down the sides and use a spoon to cover the entire inside.

Step 5:  Swirl the jar around until it's all covered, allowing excess to fall back into the cup.

Step 6:  Set the jar upside-down on paper towels or waxed paper to dry.

This part is key. Everything I read just suggested putting it into the oven at this point.  Don't do it.  Let it dry for 24 hours.  I know it seems like a long time, but I think this is part of the key to avoiding streaks.  Know why?  LOTS of the mixture will drain out, even if you think you have a thin layer inside.  You don't want that running around in there while you're trying to set it.

Step 7:  Heat oven to 175 degrees.  Place jar in the oven for 20 minutes.

This is when it will start to become transparent and dark.

Check on it after 20 minutes.  Mine looked good at this point except for a couple of still light opaque spots near the bottom.  So I flipped it over and let it go about five more minutes, which cleared it right up.  Don't worry about the green on the rack in this photo.  It's just a reflection from the glass, not a stain from the process.

Step 8:  Remove jar from oven.  USE POTHOLDERS, because it will be hot at this point!
Now you're all done.  Not too bad for my first try, I think.  I got the dark color and streak-free finish I hoped for, and it was super-cheap to do!

Saturday, May 19, 2012

Dishwasher Pods

I just recently started using these little Cascade dishwasher pods.  It seemed like a great idea, until THIS happened:


I ran the dishwasher, and after the whole cycle completed, I opened the door to find sticky dishes and a pod that didn't dissolve properly.  This happened a couple of times, and I was just about to give up when I realized the problem.  If there's moisture in the little bin where you put the pod, it sticks to it and won't fall out when the latch opens.  Just be sure the bin is dry before you add the pod, and these work great!

Wednesday, May 2, 2012

Quick-Clean Vacuum Brushes

I'll admit right up front that I'm not the world's best housekeeper.  I'm not even in the running.  However, when I do clean, I like for my cleaning tools and supplies to work.  Otherwise I'm just wasting my time.  My vacuum was getting a little sluggish, and I turned it over and noticed that the brushes were all gunked up and tied down with this yuckiness:


Gross, I know.  I remembered seeing a Pinterest pin suggesting using a seam ripper to get all that out of there.  I'm not a seamstress and didn't have one.  As luck would have it, I happened to be headed to the craft store around this time, so I picked one up there.

I think I paid $2.49 for this, somewhere around there.  


You just use the sharp part to rip out the lint/strings/hair/whatever.  It's certainly quicker than using scissors or just trying to pull everything out.

It was a quick little poke, push, rip, twist, pull, and voila!


This took almost no time at all.  Best of all, I really think it improved the suck power of my vacuum.  This tip is a keeper!

BEFORE

AFTER


Tuesday, April 17, 2012

Soap Scum Killer


This is the first time I've ever used a homemade household cleaner.  I had spent so much money trying to get rid of the soap scum and hard water marks in my tile shower, to no avail.  The best retail product I'd found was Comet Bathroom Cleaner for Soap Scum & Hard Water Film.  It looked great after I first used it, but the next morning everything was streaky again (though a little less so).  

Naturally, I was intrigued by something billed as the "Soap Scum Killa" and decided to give it a try.  

Soap Scum Killa

What you need:
- 1 cup Distilled white vinegar
- 1 cup Dawn dish soap (must be the blue kind for some reason)
- Spray bottle
- Microwave

To Do:
Heat up 1 cup vinegar for 2 minutes.  
Pour into spray bottle.
Add 1 cup blue Dawn to spray bottle.
Shake gently. (If you shake too much you'll get an overload of bubbles which makes it harder to spray out.)

Spray the mixture on and let it set for two hours, or overnight for really tough stains.  Then just rinse with water and a sponge.  Voila!  I thought my stains were really bad, but I was so excited to see the results that I just waited for two hours.  It was plenty of time for me, but if you need to go longer, I'm sure it would just be better.

I think one of the tricks here is that the Dawn makes the vinegar stick to the walls rather than running down the sides.  That gives it more time to destroy the gunk.

To conclude:  
-The ratio is equal parts vinegar and Dawn.  You can make more or less as needed.  I found this amount was just enough for my shower.  

- I haven't tried reusing the solution after it has set.  I'm thinking I'll just make a new batch each time, because I liked the idea of the vinegar being warm.  Plus, the amount I made didn't leave any extra when I was done.

- Everything I've read about this says the Dawn must be the blue kind.  I didn't want to deviate from the norm, so I got the blue kind, and it worked great.

- My shower did smell like vinegar for about an hour after I did this, but then it was just fresh and clean after that.

I didn't take any photos of the before and after, because I tried this shortly before I started blogging about these finds.  Here's a before-and-after from the source blogger at Life, Crafts, Whatever.

Before

After

I must say, the results I saw were very similar, and I used it on the shower door and the stone tile inside the shower.  Amazing!  This was so easy, and the streaking has stayed gone for a week.  This soap scum killer will be my go-to shower cleaner from now on.  

Tried it, loved it!